Herve Leger Bandage Top DIY
If there's one fashion item that I love more than a Herve Leger dress, it's a Herve Leger top. Unfortunately, there aren't nearly as many HL top options, and many of them are too low-cut for everyday wear. So, I took it into my own hands and changed one of my beloved dresses into a top. Plus, a few pictures of the top with shorts, jeans, and skirts!
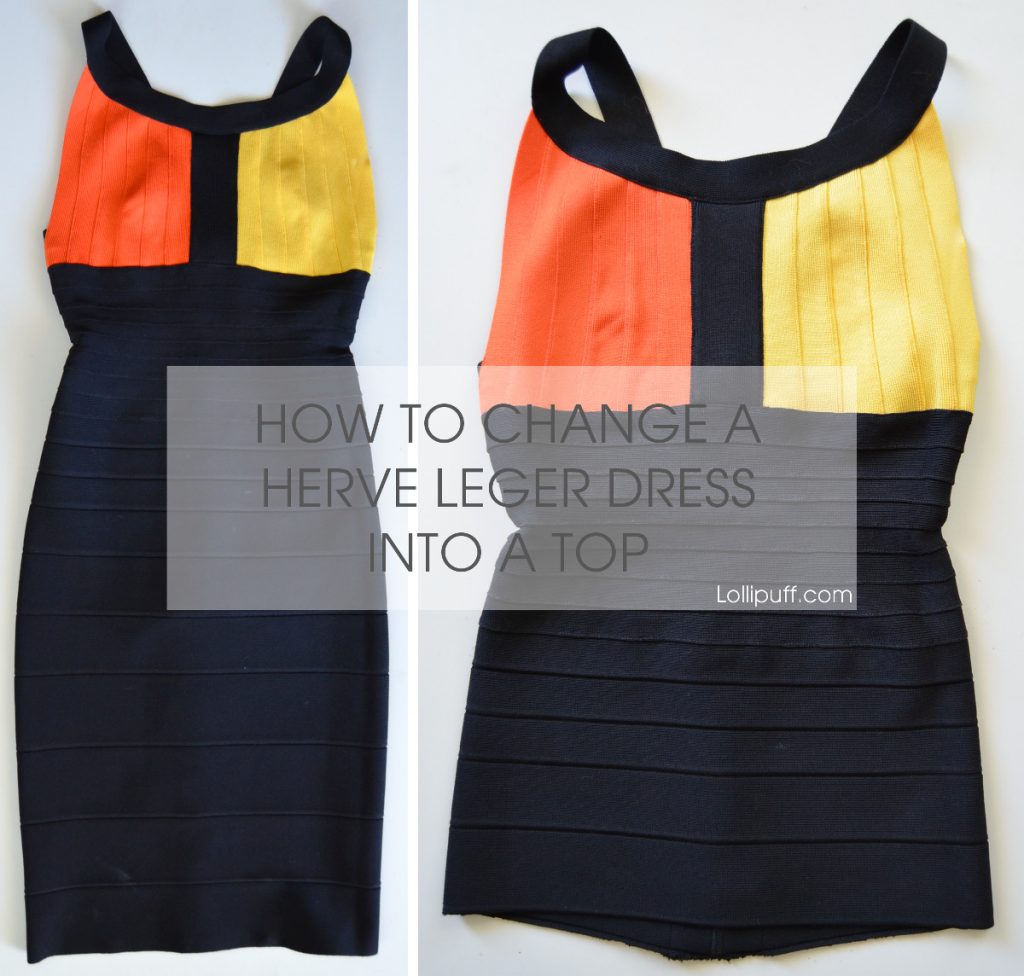
Here's the dress in its original form. This dress has phenomenal hold; it really cinches around the ribcage. For those of you who are interested in this dress (commonly referred to as the Pomy or Romy), it does run one size small.

I picked this dress to alter, as I have more Herve Leger dresses that I can wear (see my Herve Leger collection here), and I'm constantly enjoying my Herve Leger tops. Tops are just more versatile for my lifestyle.
The top sports a modest neckline making it perfect to wear any time. Also, the primary color on this top is black, making it super easy to match with bottoms.
To alter a Herve Leger dress to a top, all you'll need is a banded HL dress (can be faux banded or individually banded), scissors, seam ripper (if your dress is individually banded) and possibly some needle and thread in the color of the clothing.
As always with any DIY, please proceed with caution and at your own risk.
Step 1: Locate the bottom of the top
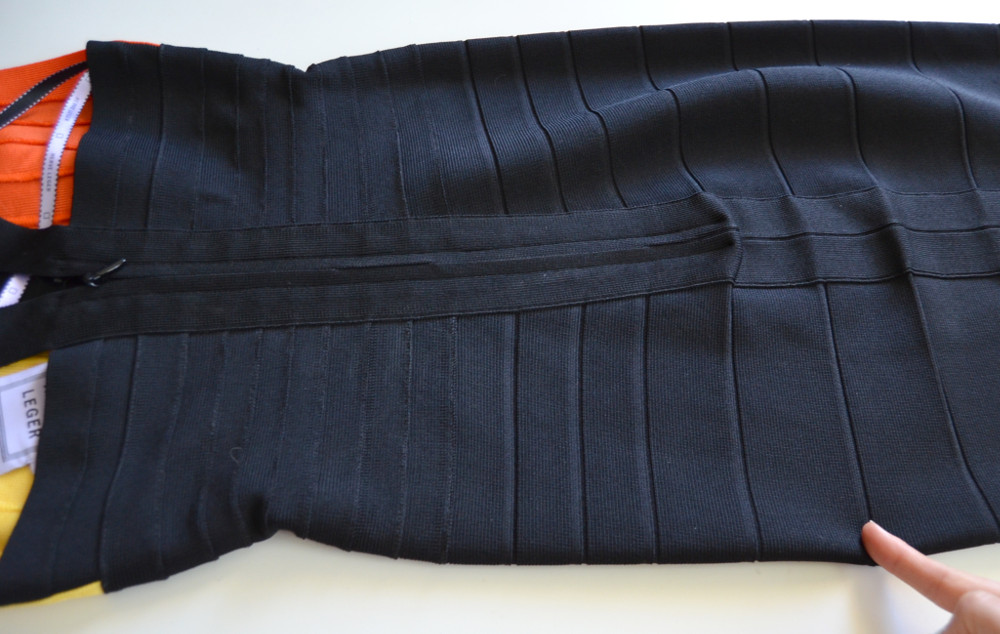
First, you'll want to figure out where you want your Herve Leger top to end. It should end on one of the lines of the bands.
Step 2: Cut
If your dress is individually banded (meaning stitches are holding the bands together), you'll need to separate the bands with a seam ripper. Please make sure that the dress is fully zipped up when doing this.
If your dress is faux banded, you'll just need to cut carefully along the band's line. See how I have done this in the above picture. Please make sure that the dress is fully zipped up when doing this.
For my top, the cut was conveniently below the entire zipper length. If the cut falls above the end of the zipper, you'll want to secure the end of it with a needle and thread.
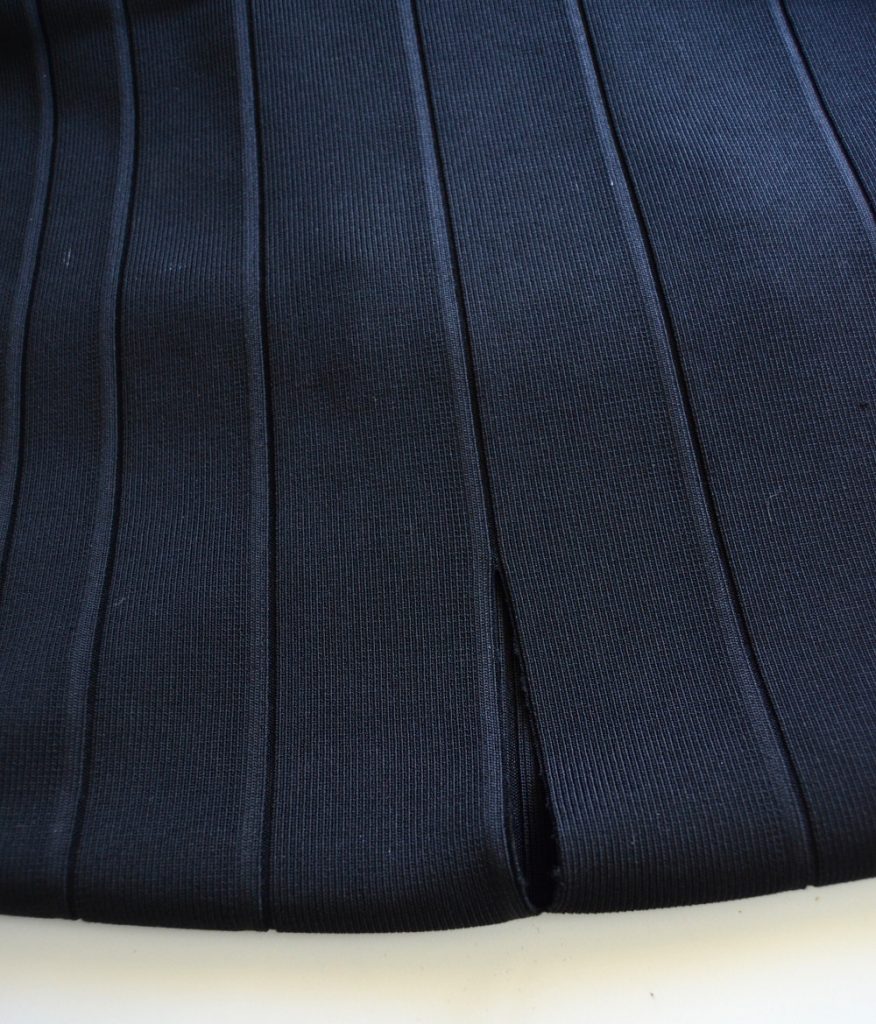
Step 3: Secure any rough edges
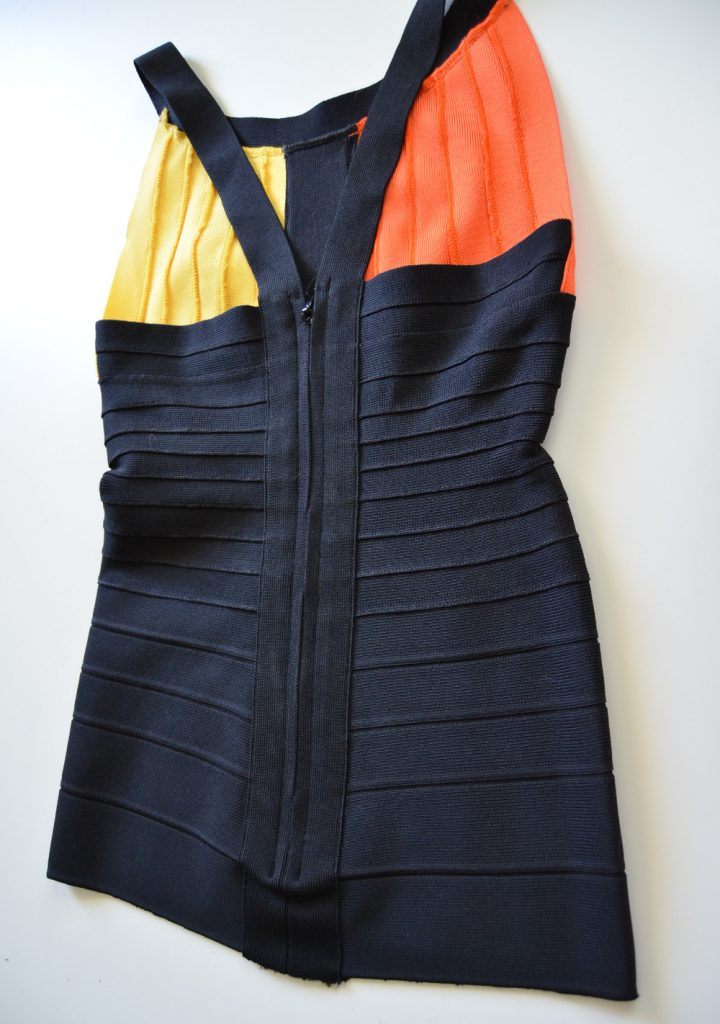
I didn't really have too many rough edges. The only area was at the back where the vertical band was cut. I secured this with some simple looped stitches, but even without it, I think it would have been fine.
Now, for the fun part. Let's see how this new top looks with some different bottoms!

As you can see, the top works with even the most casual bottoms, a pair of super-distressed denim shorts!


And, here I've just pulled on the cut skirt from the original dress and wore it underneath the new top. Of course, it is now shorter than the original uncut dress, but it still totally works!