How to Refurbish a Louis Vuitton Bag
Because of the desirability and quality of Louis Vuitton, there are many vintage pieces out there. While these bags are still fashionable, some signs of age are probably visible. This post will go over how to refurbish all of the usual areas that show wear, and how to make your bag look newer than it really is by lightening and evening the vachetta leather and brightening the metal fittings.

Here is our bag before any refurbishment. This charming Speedy 30 is 22 years old and is considered a vintage piece. As is, it's still very wearable, but we can make it way way better!
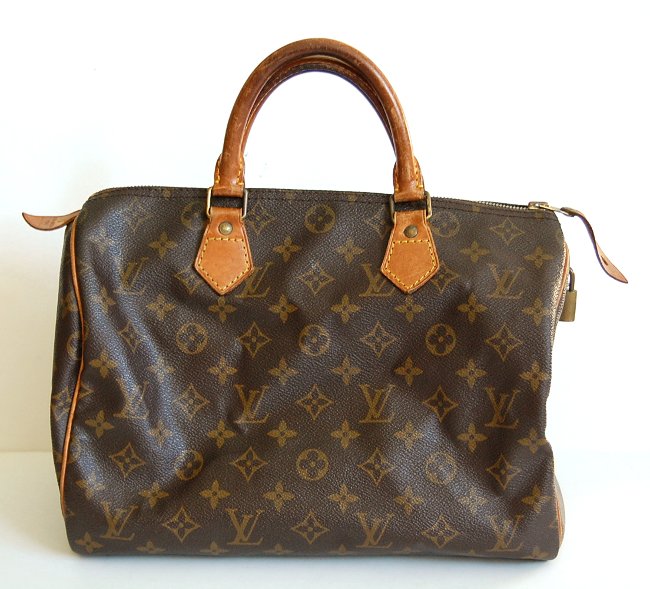
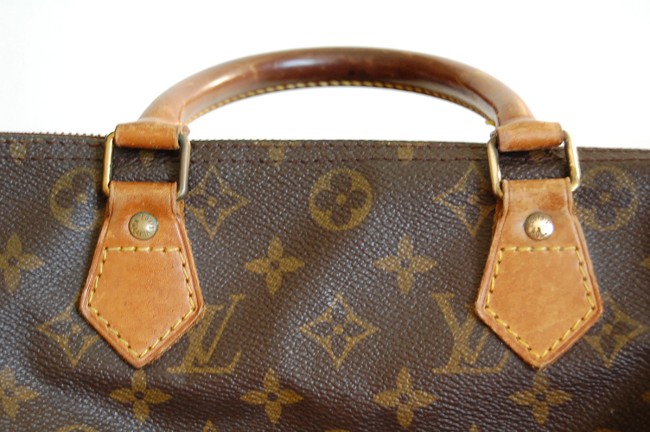
As you can see, the monogram canvas holds up very well. There is no tearing and very little wear to it. But, the metal fittings, lock, and zipper have lost their luster. Instead of shiny gold, it is a dull bronze accompanied with a little bit of rust. Also, the vachetta leather exhibits age. Vachetta leather is a beautiful leather that develops a patina over time. Some people love a darkened patina on their Louis Vuitton, but blotchy uneven patina is generally not desirable. Other than these two things, this classic vintage bag does not exhibit much wear at all. Luckily, we can fix dark blotchy vachetta leather and dull metal hardware!
psst... Btw, you can use this guide on most canvas and vachetta leather Louis Vuitton bags, not just Speedy bags!
What You Will Need to Refurbish your Louis Vuitton Bag
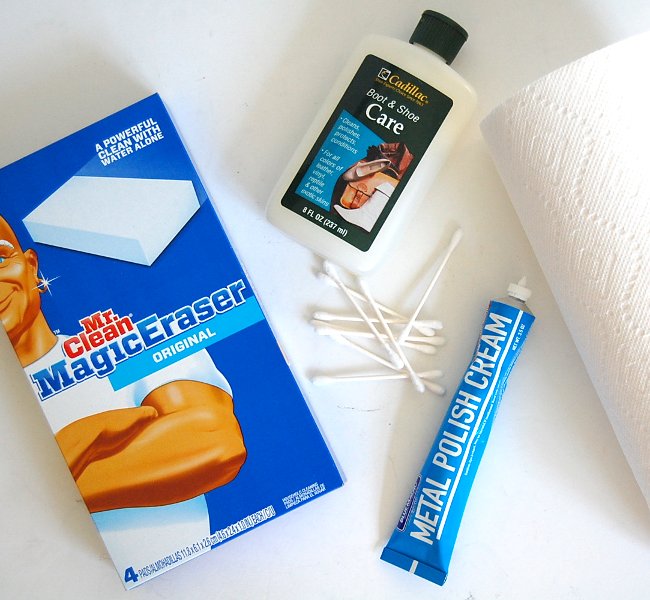
1. Paper towels
2. At least 5 q-tips
3. BlueMagic metal polish cream
4. 1 Mr. Clean Magic Eraser
5. Cadillac boot & shoe care leather conditioner
6. Clean soft cloth (not pictured)
I strongly recommend Blue Magic metal polish cream due to its effectiveness. It fights the tarnish and gunk, while not disturbing any etching and brand markings. Do NOT use metal polish on plated hardware. For example, Chanel frequently uses gold-plated hardware on their bags.
I also strong recommend Cadillac leather conditioner. I've tried and used MANY different leather conditioners including Apple and more high-end conditioners, and Cadillac is the best, most versatile one that I have tried. Used reasonably and sparingly, it is one of the few leather conditioners in the market that will not darken vachetta leather, while noticeably re-hydrating it.
Now, let's proceed with how to make your bag look amazing!
Fixing Dull Brass Hardware
STEP 1: With a dry paper towel, try to wipe off as much of the rust around any of the fittings.
STEP 2: Now, using the q-tips, buff the small metal fitting pieces with a small amount of metal polish cream. Try not to get any of the cream onto the leather.
STEP 3: Using a dry paper towel, firmly buff the metal pieces that have received metal polish treatment. Keep buffing until the metal is shiny and no longer giving you black residue.
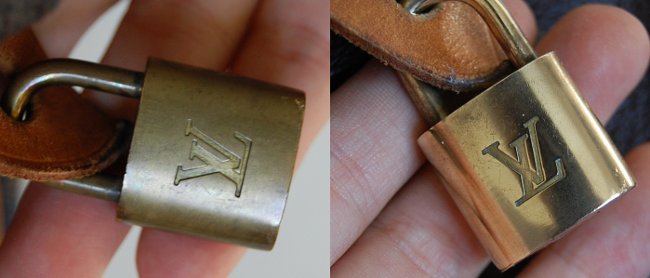
STEP 4: Buff larger metal hardware such as the lock as well. Instead of using a q-tip, use a paper towel for both polish cream application and buffing. Locks will require this step to be repeated a few times before it is shiny.
And, here is the bag after all of the metal hardware have received polishing. This included the zipper as well.

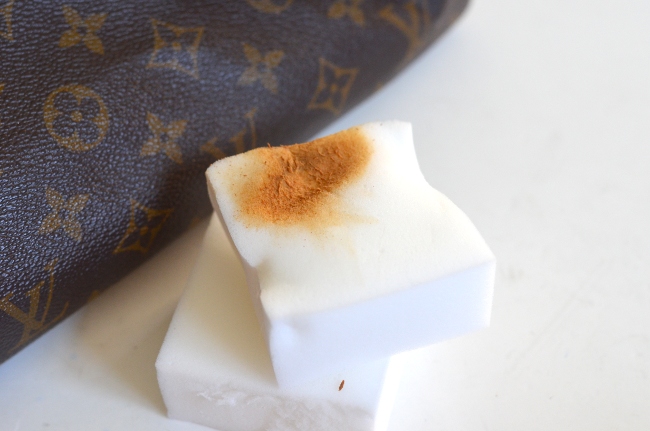
Lightening Vachetta Leather from Dirt and Oil
Before proceeding to the next step (Magic Eraser), please examine how glossy the vachetta leather is. If the leather does not look glossy, do NOT apply the magic eraser step. If the leather is not glossy looking, it means that the bag was recently cleaned and further cleaning can be bad for it, or that it is too dry or too new for cleaning.
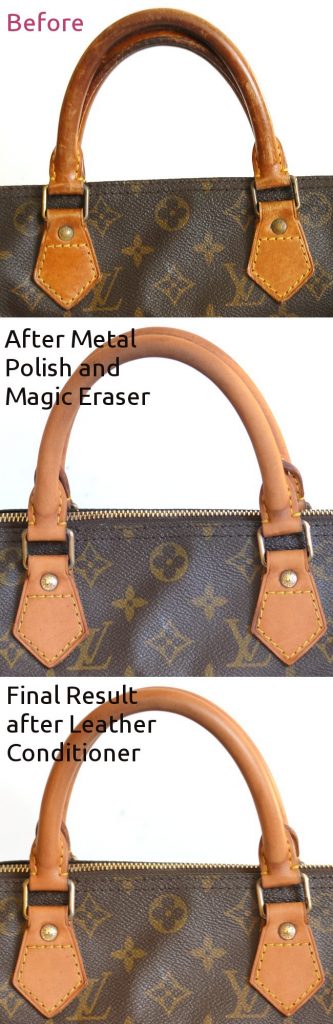
STEP 5: Taking your Magic Eraser, dampen it, and squeeze out all excess water. Now rub this against the vachetta leather handles, and tabs. Remember, rub, NOT SCRUB! Focus on each spot for 15 seconds. Do not do more as this cleaning process is very strong and too much time in any one spot can dry out the leather. So, this means, the small end tabs each took 15 seconds of rubbing, while each handle with larger surface area got a total of 1.5 minutes of rubbing. You will need to rinse out the Magic Eraser every once in a while, because it accumulates a lot of residue. Squeeze out excess water each time before going back to cleaning the vachetta leather. You will want to do this step in a large sink, as the Magic Eraser will start to disintegrate and crumble. Try to keep the bag as dry as possible.
The vachetta leather will be darker when you do this step. Don't freak out! This is only temporary. After this step, you will see the leather start lightening within 3 minutes!
Conditioning and Canvas Cleaning
STEP 6: Immediately, after the leather has dried (approximately after 30 minutes - 1 hour), put a small amount of Cadillac leather conditioner onto a soft clean cloth and condition the entire bag.
A small amount of Cadillac leather conditioner will make the cleaned vachetta leather hydrated, smooth and buttery with a slight sheen. This final step is important and keeps your bag protected.
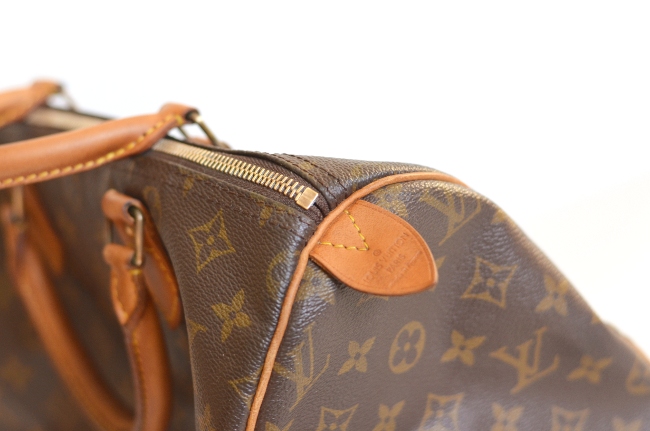
STEP 7: Wipe down the monogram canvas, damier canvas, or epi leather with a soft clean cloth and some Cadillac conditioner.
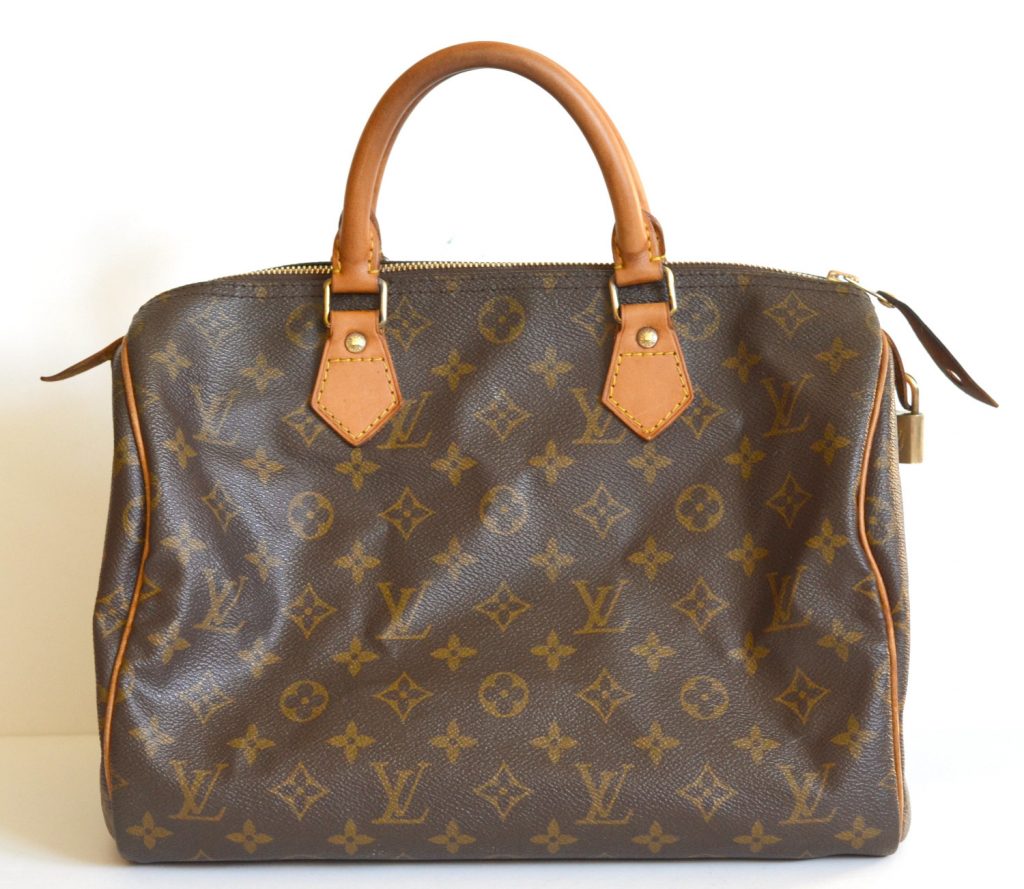
Here is the beautiful final result:
And, just to show the drastic transformation, here are closeups of the vachetta leather handles throughout the cleaning process.
And, here is the entire bag:
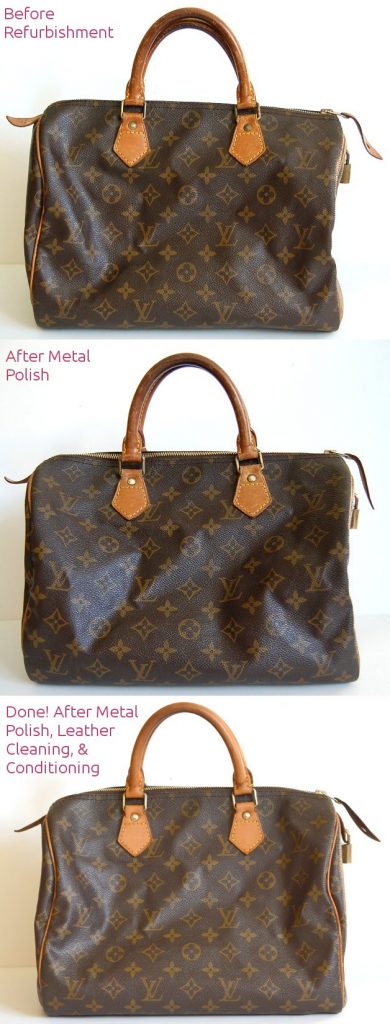
I'm so happy with the results of this diy! The vachetta leather is so even in color and many shades lighter! The metal fittings look so glamorous!
Though this process worked very well for us with no problems, we do want to caution that outcomes cannot be guaranteed. Please proceed with caution.
Thank you so much! Here’s my beautiful bag thanks to you!
good job, thanks for posting
WOW- That looks amazing! Thanks so much for the sage advice!
Actually, I have a question – What if your handles have slight cracking? Should you avoid doing this, or is it okay to do this and then condition them to try and help the cracking?
good tip with magic eraser !
Omg! I just purchased a pre-loved LV bag that’s discontinued. I’m definitely going to treat it with your suggestion to preserve it for years to come. Thank you!
Wow, great job thanks so much for posting. You are a life saver. 🙂 I’ll post my before and after, once I have cleaned it.